> For the complete documentation index, see [llms.txt](https://docs.3dolphins.ai/llms.txt). Markdown versions of documentation pages are available by appending `.md` to page URLs; this page is available as [Markdown](https://docs.3dolphins.ai/marketing/template/request-template/marketing-template/standard-message/buttons-template.md).

# Buttons Template

This feature allows you to add an action button for customers to click when they receive the message. There are several button options available, namely **Quick Reply** and three **Call To Action** (CTA) buttons, i.e. **Website**, **Call** , and **Copy Offer Code**. &#x20;

The following are the terms for each CTA button:

<table><thead><tr><th width="213.66668701171875">Category</th><th>Limitation</th></tr></thead><tbody><tr><td>Number</td><td>The maximum number of buttons that can be used is 10 buttons.</td></tr><tr><td>Quick Reply</td><td>The maximum number of buttons for <strong>'Quick Reply'</strong> is 10 buttons (if only <strong>'Quick Reply'</strong> buttons are used).</td></tr><tr><td>Call</td><td>The maximum number of buttons for <strong>'Call'</strong> is 1 button.</td></tr><tr><td>Website/URL</td><td>For the <strong>'Website/URL'</strong> button, the maximum number of buttons that can be used is 2 buttons (<strong>'Static'</strong> and <strong>'Dynamic'</strong>).</td></tr><tr><td>Copy Offer Code </td><td>The maximum number of buttons that can be used for <strong>'Copy Offer Code'</strong> is 1 button.</td></tr></tbody></table>

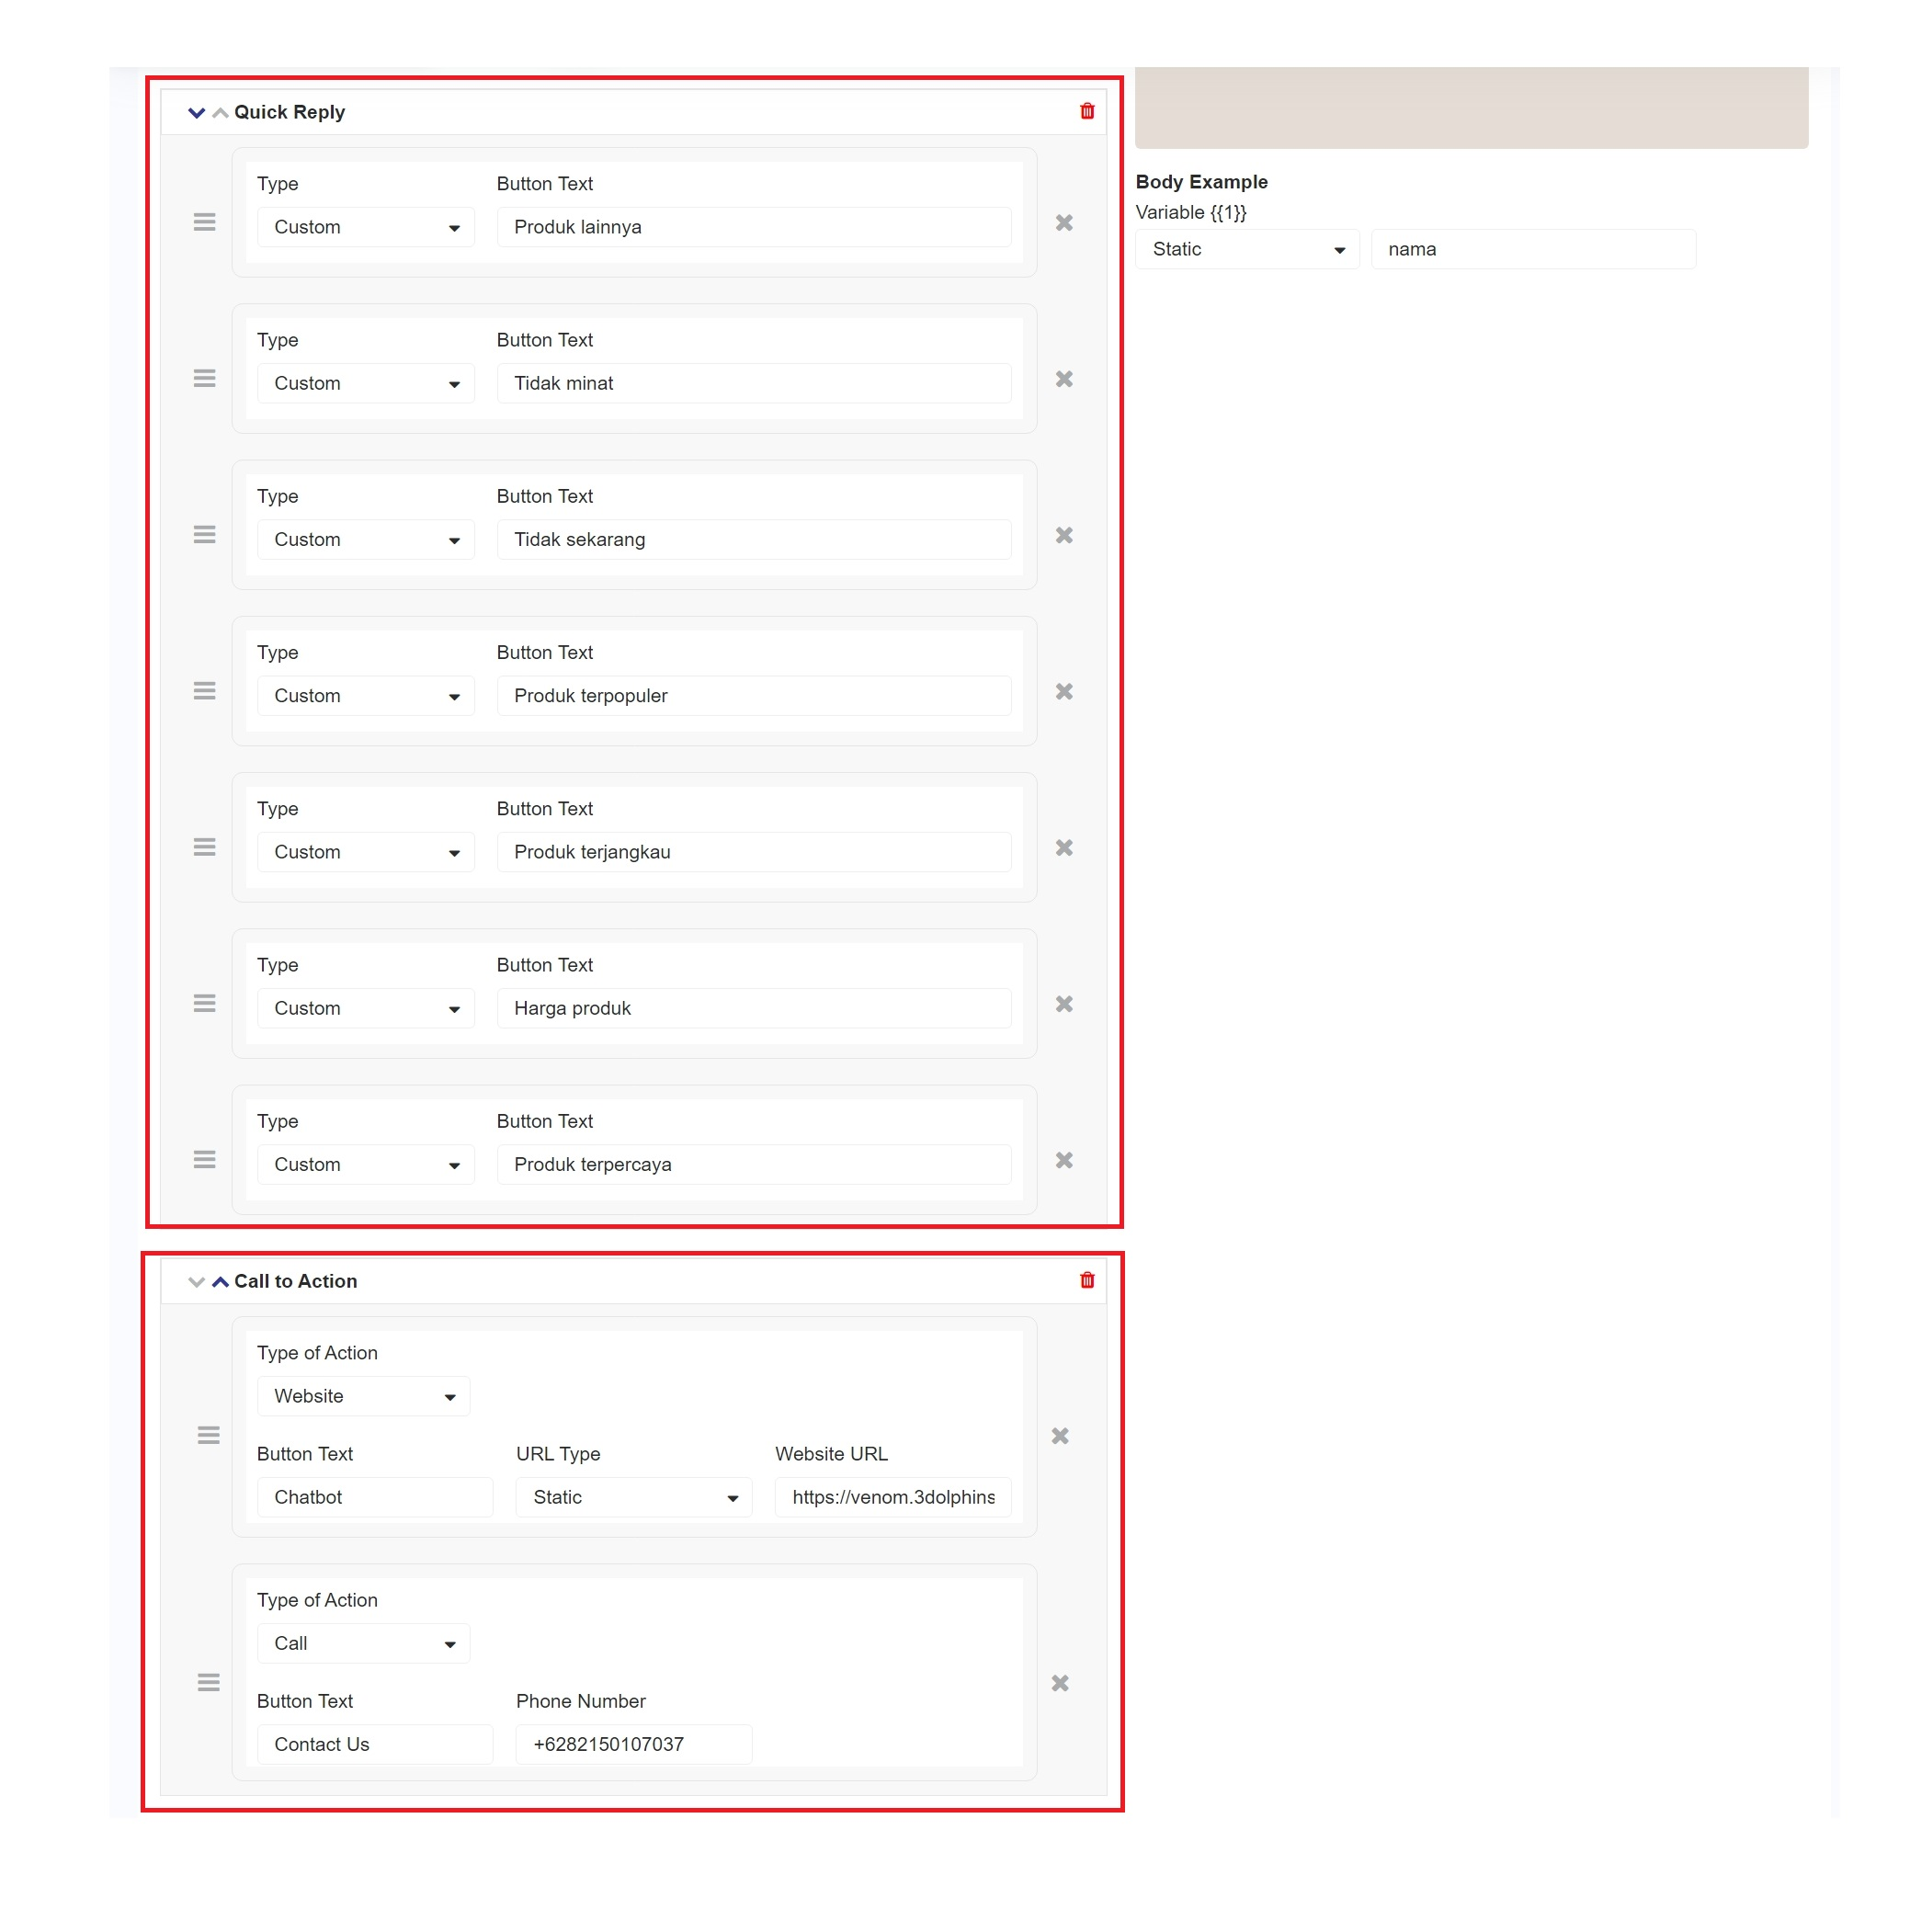
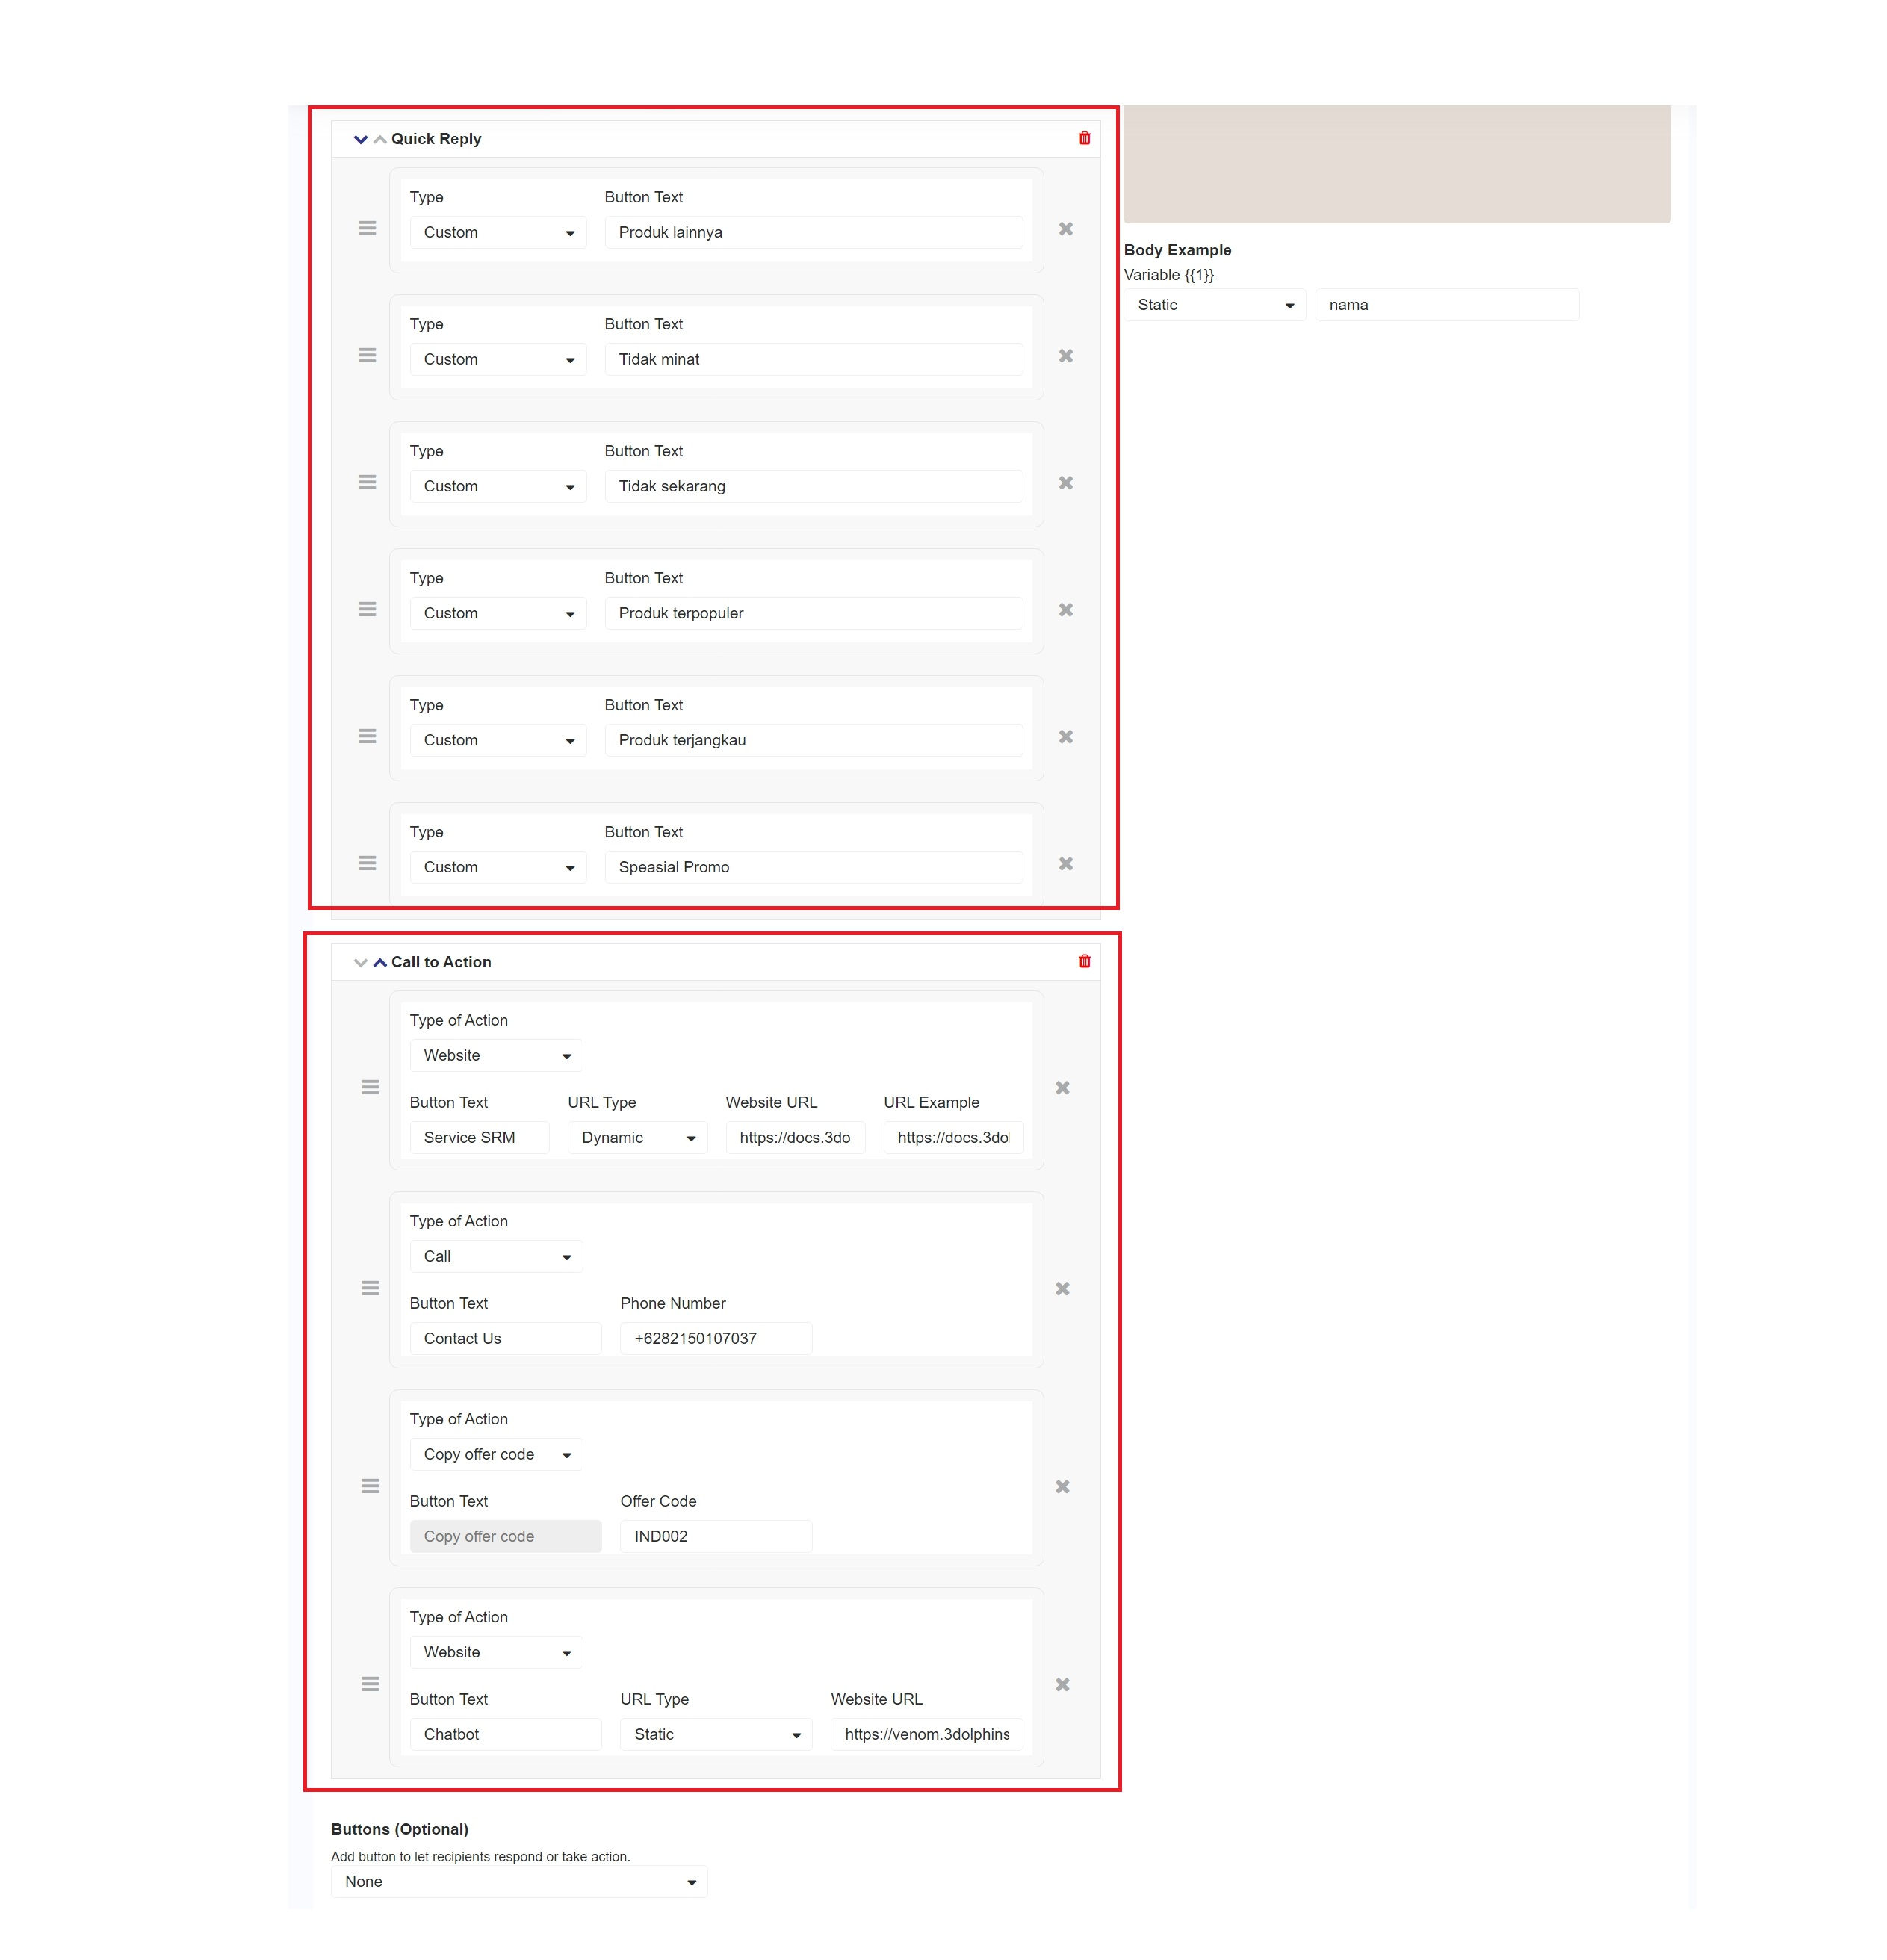
For example, if you want to create **6 Quick Reply buttons**, the remaining **'Call To Action' (CTA)** buttons that can be created are **4 buttons**, consisting of **1 'Call' button, 1 'Copy Offer Code' button,** and **2 'Website' buttons**. This is because the maximum number of buttons that can be created is **10 buttons.**&#x20;

<figure><img src="/files/1OAFvwB63ohAnEYrHirz" alt=""><figcaption><p>Maximum Buttons</p></figcaption></figure>

If you want to use multiple actions, there are several grouping requirements as follows.

| Category         | Limitations                                                                                    |
| ---------------- | ---------------------------------------------------------------------------------------------- |
| Valid Grouping   | Valid only when the **'Quick Reply'** button is followed by another **'Quick Reply'** buttons. |
|                  | Valid if **'Quick Reply'** button is followed by **'Call To Action' (CTA)** buttons.           |
|                  | Valid if **'Call To Action' (CTA)** button is followed by **'Quick Reply'** buttons.           |
| Invalid Grouping | Invalid if **'Call To Action' (CTA)** button is placed between **'Quick Reply'** buttons.      |
|                  | Invalid if **'Quick Reply'** button is placed between **'Call To Action' (CTA)** buttons.      |

If you want to create **Quick Reply** button, it will be valid only if accompanied by **'Call to Action' (CTA)** button, such as a **'Website'** button and a **'Call'** button.

<figure><img src="/files/sLTag1GLnc3c9VwIL4ok" alt=""><figcaption><p>Maximum Buttons</p></figcaption></figure>

### Quick Reply

When you want customers to respond quickly without manually typing, you can use the '**Quick Reply'** feature. With this feature, customers simply click the provided button to select the appropriate response.

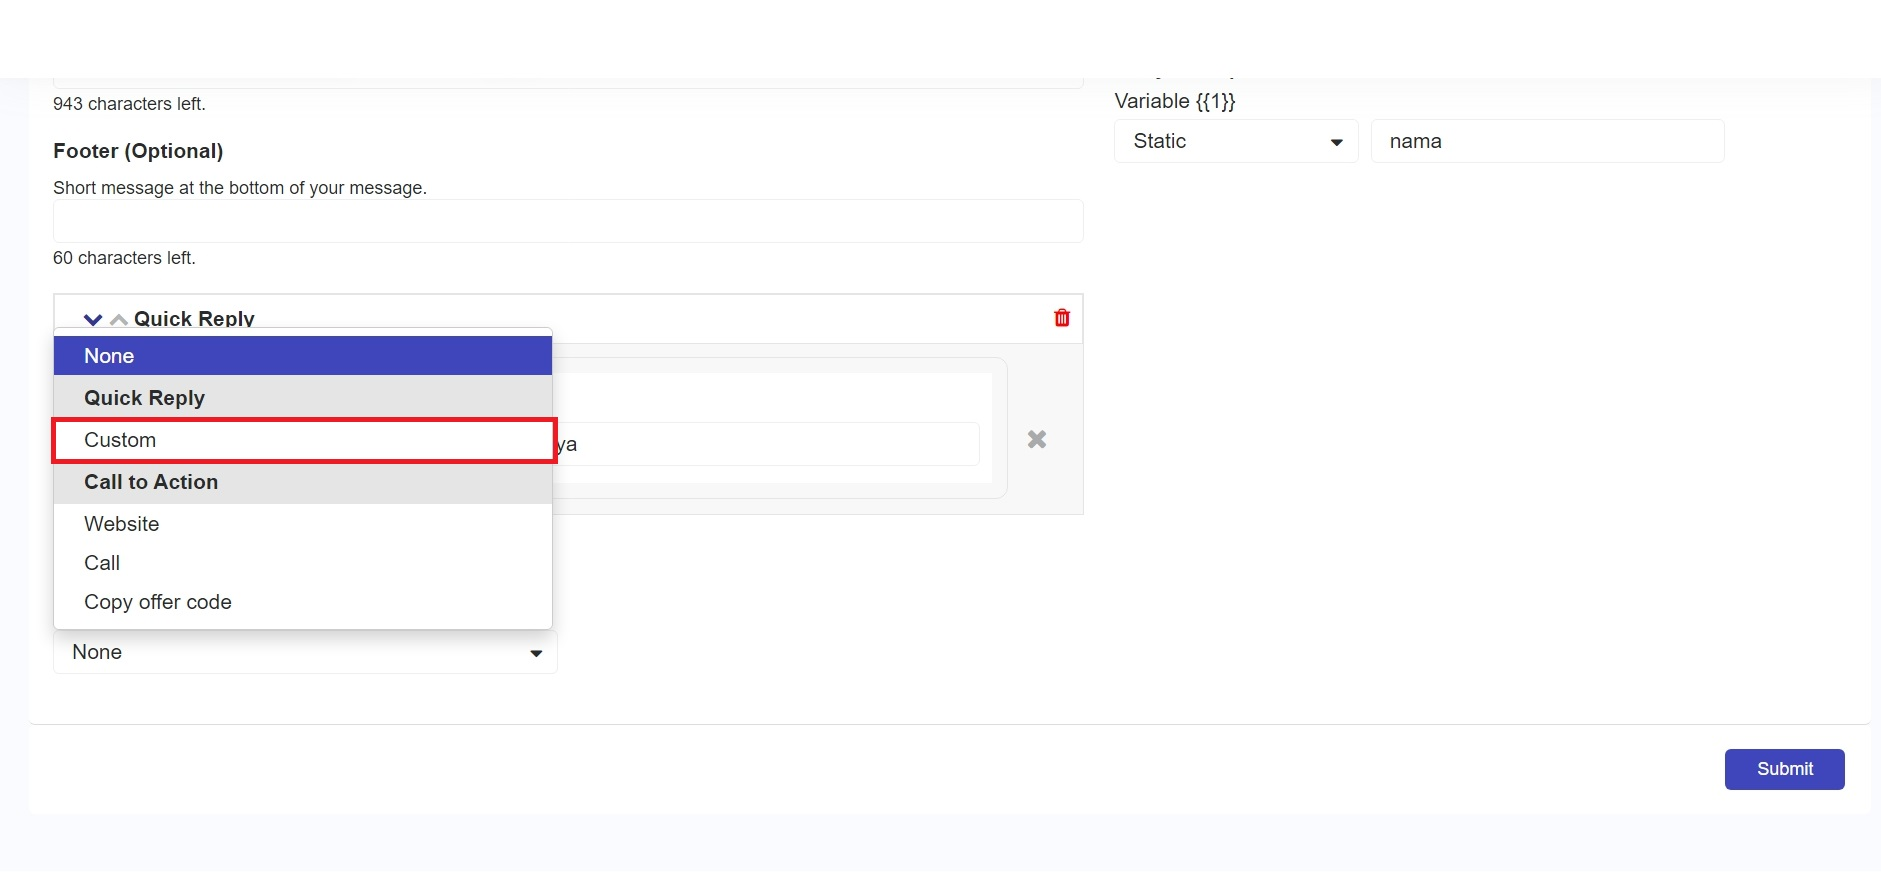
To create **'Quick Reply'** button, click the **'Buttons'** dropdown and select **'Quick Reply'**, then enter the text you want to display.

<figure><img src="/files/mkA9mbQ3xCaC8NCK3ntK" alt=""><figcaption><p> Quick Reply Buttons</p></figcaption></figure>

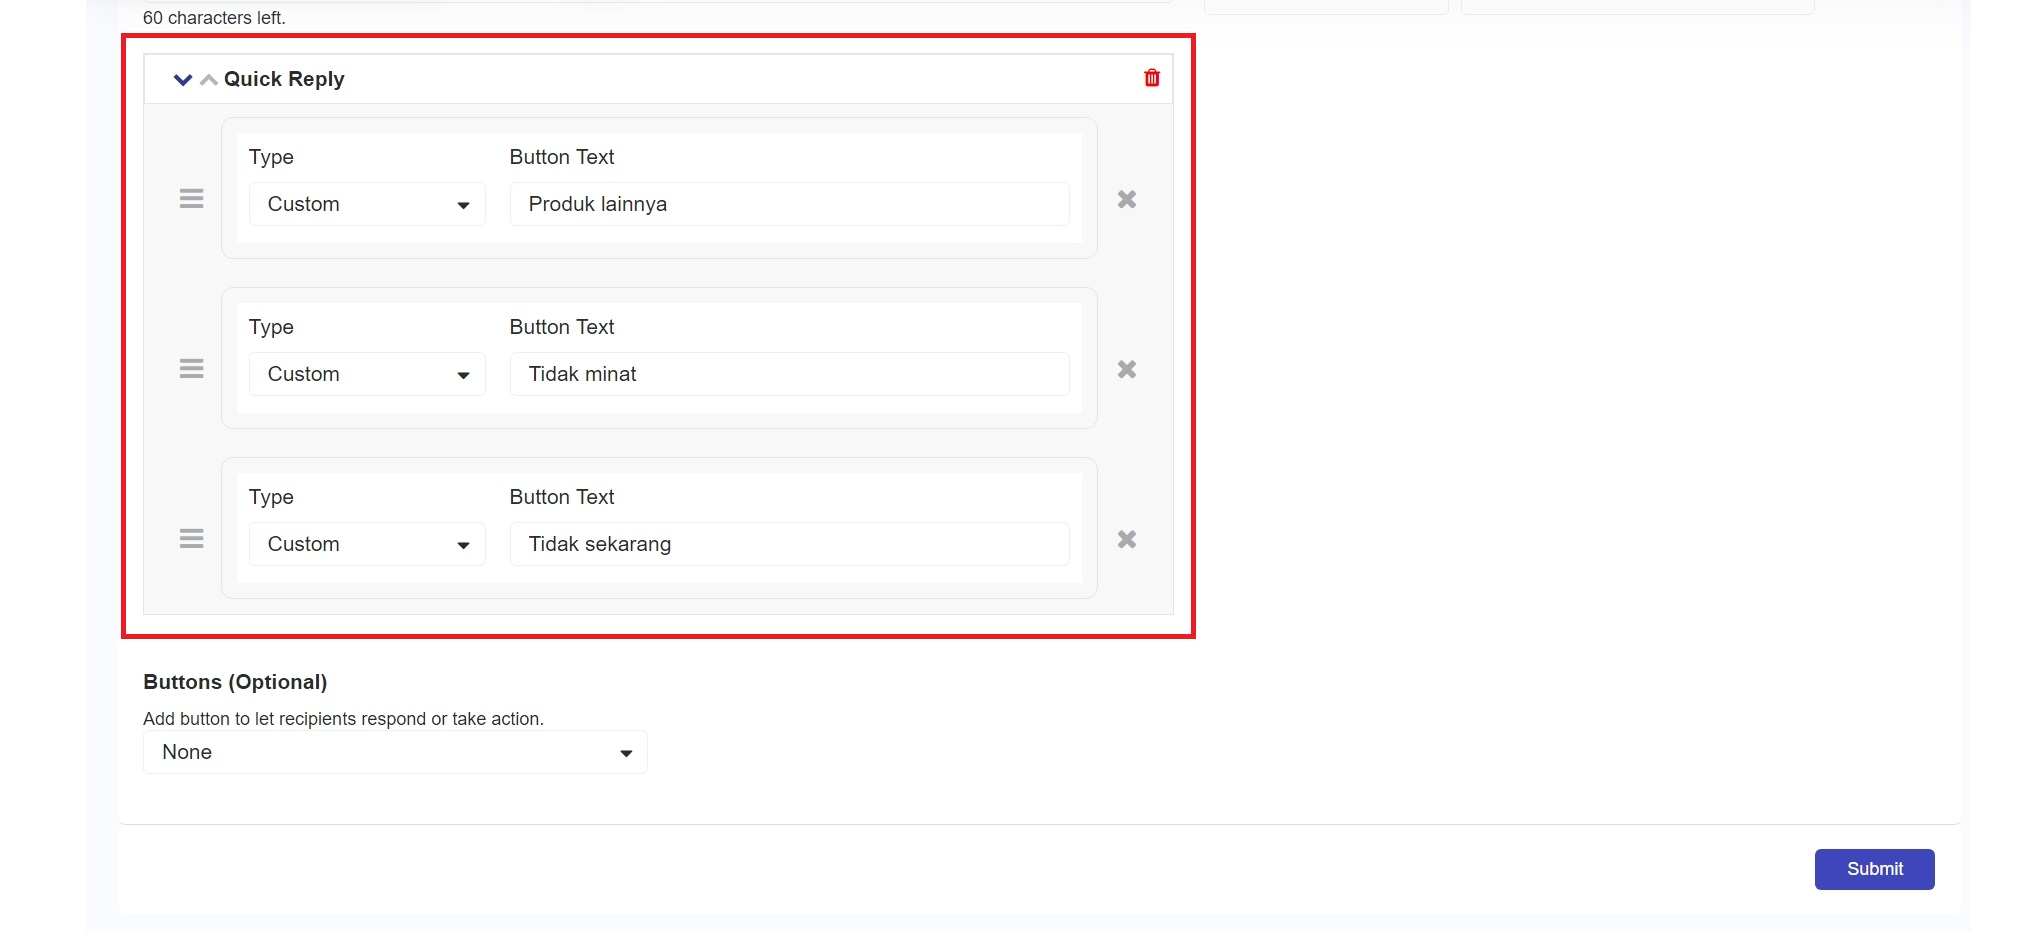
You will see a box to add a **'Quick Reply'** action button, as shown in the image below.&#x20;

<figure><img src="/files/Lu2h3DVg0inktm8vvHeq" alt=""><figcaption><p>Set Quick Reply Buttons</p></figcaption></figure>

**Component Explanation:**&#x20;

<table><thead><tr><th width="177.8333740234375">Name</th><th>Description</th></tr></thead><tbody><tr><td>Type </td><td>In <strong>'Quick Reply'</strong>, there is only the custom type, which is designed to fill the field according to your preferences.</td></tr><tr><td>Button text</td><td>Input text that will be displayed to the customer.</td></tr></tbody></table>

{% hint style="info" %}
Please note that the payload data to be sent must be defined in the xls/csv file in the [recipient](/marketing/notification/create-notification/account-and-recipients.md#upload-from-csv) template at the **account & recipient** stage.
{% endhint %}

### Website/URL

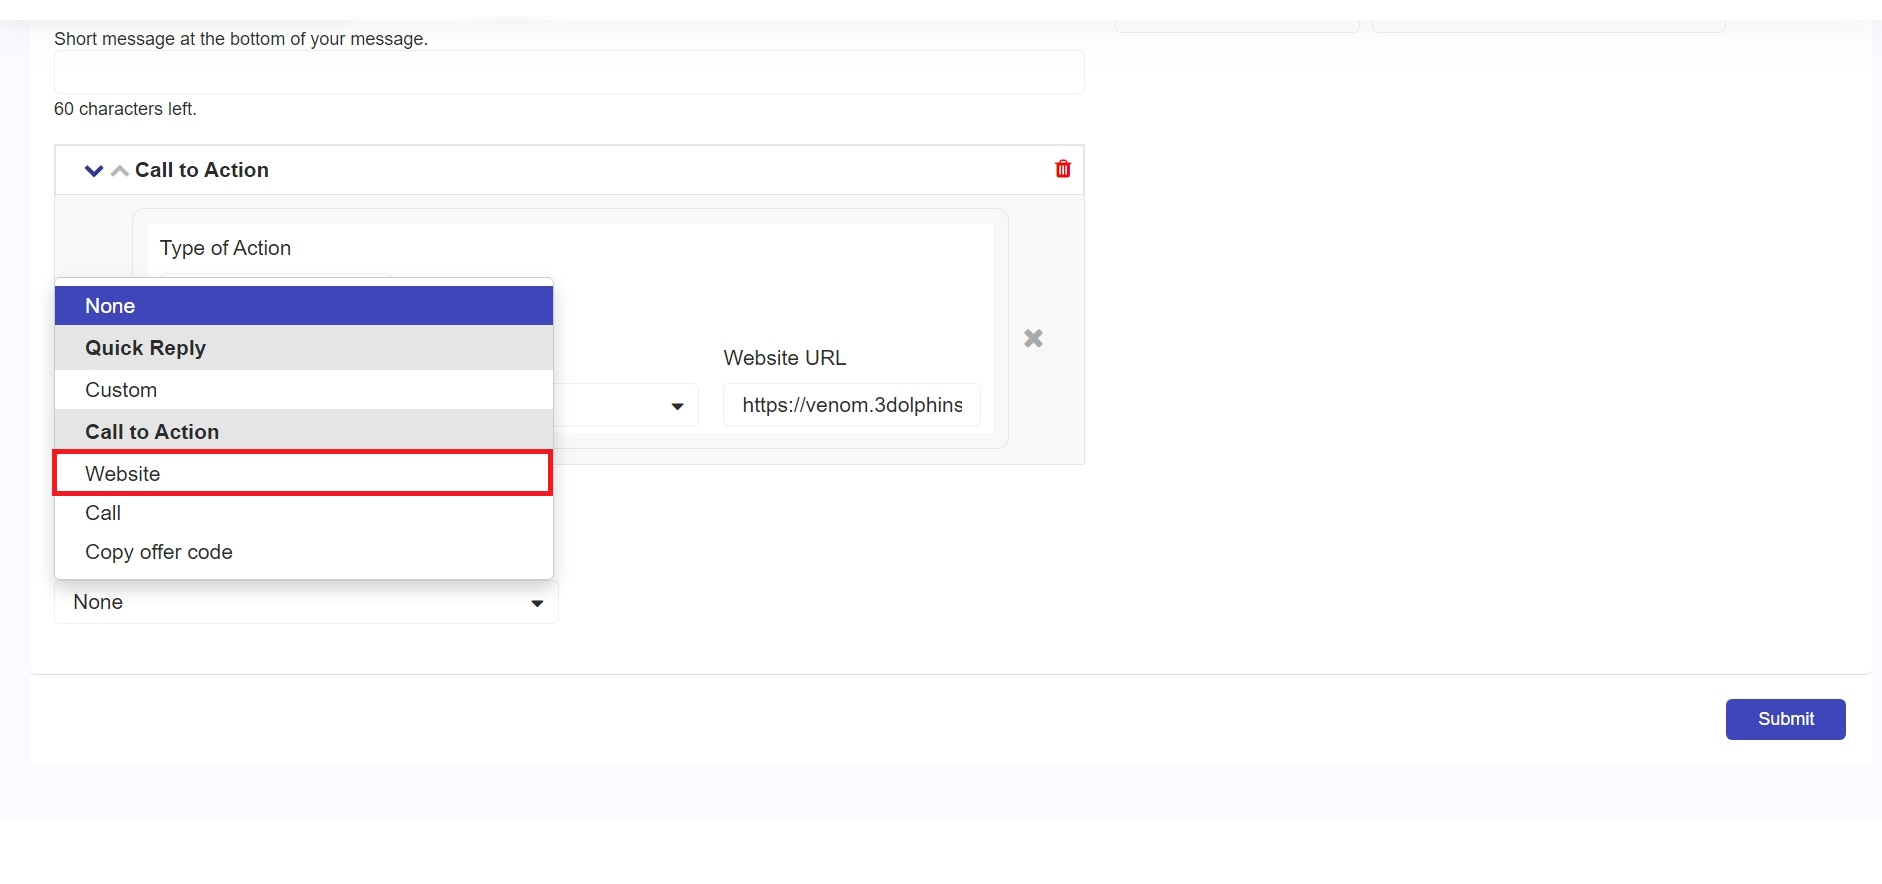
When you want to direct customers to a website after clicking a button, you can use the **'Website/URL'** button feature. To create website button, click the **'Buttons'** dropdown, select **'Website'**, then enter the text you want to display.&#x20;

<figure><img src="/files/3dWujUqcnESajEM2M8FP" alt=""><figcaption><p>Website/URL Buttons</p></figcaption></figure>

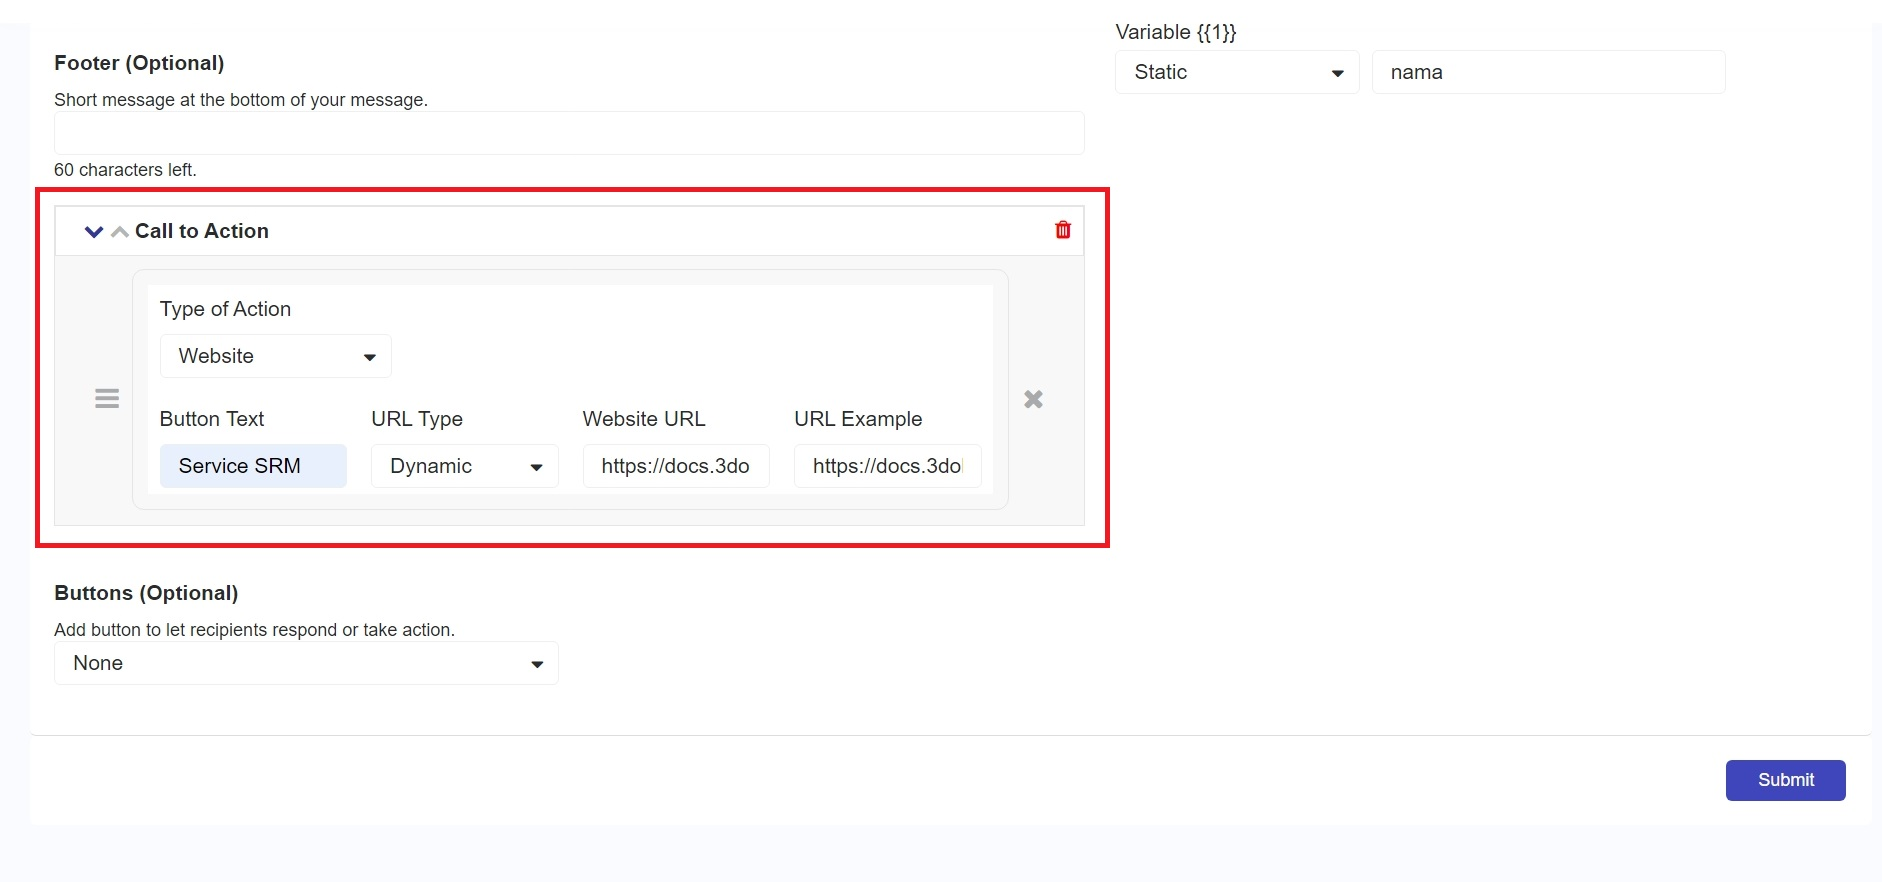
Once the **'Website/URL'** button has been added, you will see a box like the one below.

<figure><img src="/files/O4is0IF99bT9EHjW0IHw" alt=""><figcaption><p>Set Website/URL Buttons</p></figcaption></figure>

**Component Explanation:**

<table><thead><tr><th width="190.33331298828125">Name</th><th>Description</th></tr></thead><tbody><tr><td>Type of Action</td><td>Indicates the Call to Action (CTA) button type you have selected.</td></tr><tr><td>Button text </td><td>The text displayed on the button in the broadcast message.</td></tr><tr><td>URL Type</td><td><p>There are 2 types of <strong>URL Type</strong> button, i.e. <strong>Static</strong> and <strong>Dynamic.</strong><br><br><strong>Note:</strong></p><ul><li><strong>Static</strong> = directs to a single website destination.</li><li><strong>Dynamic</strong> = directs to multiple different website destinations.</li></ul></td></tr><tr><td>URL Example</td><td>To test the URL where the end of the URL is filled with actual data.</td></tr></tbody></table>

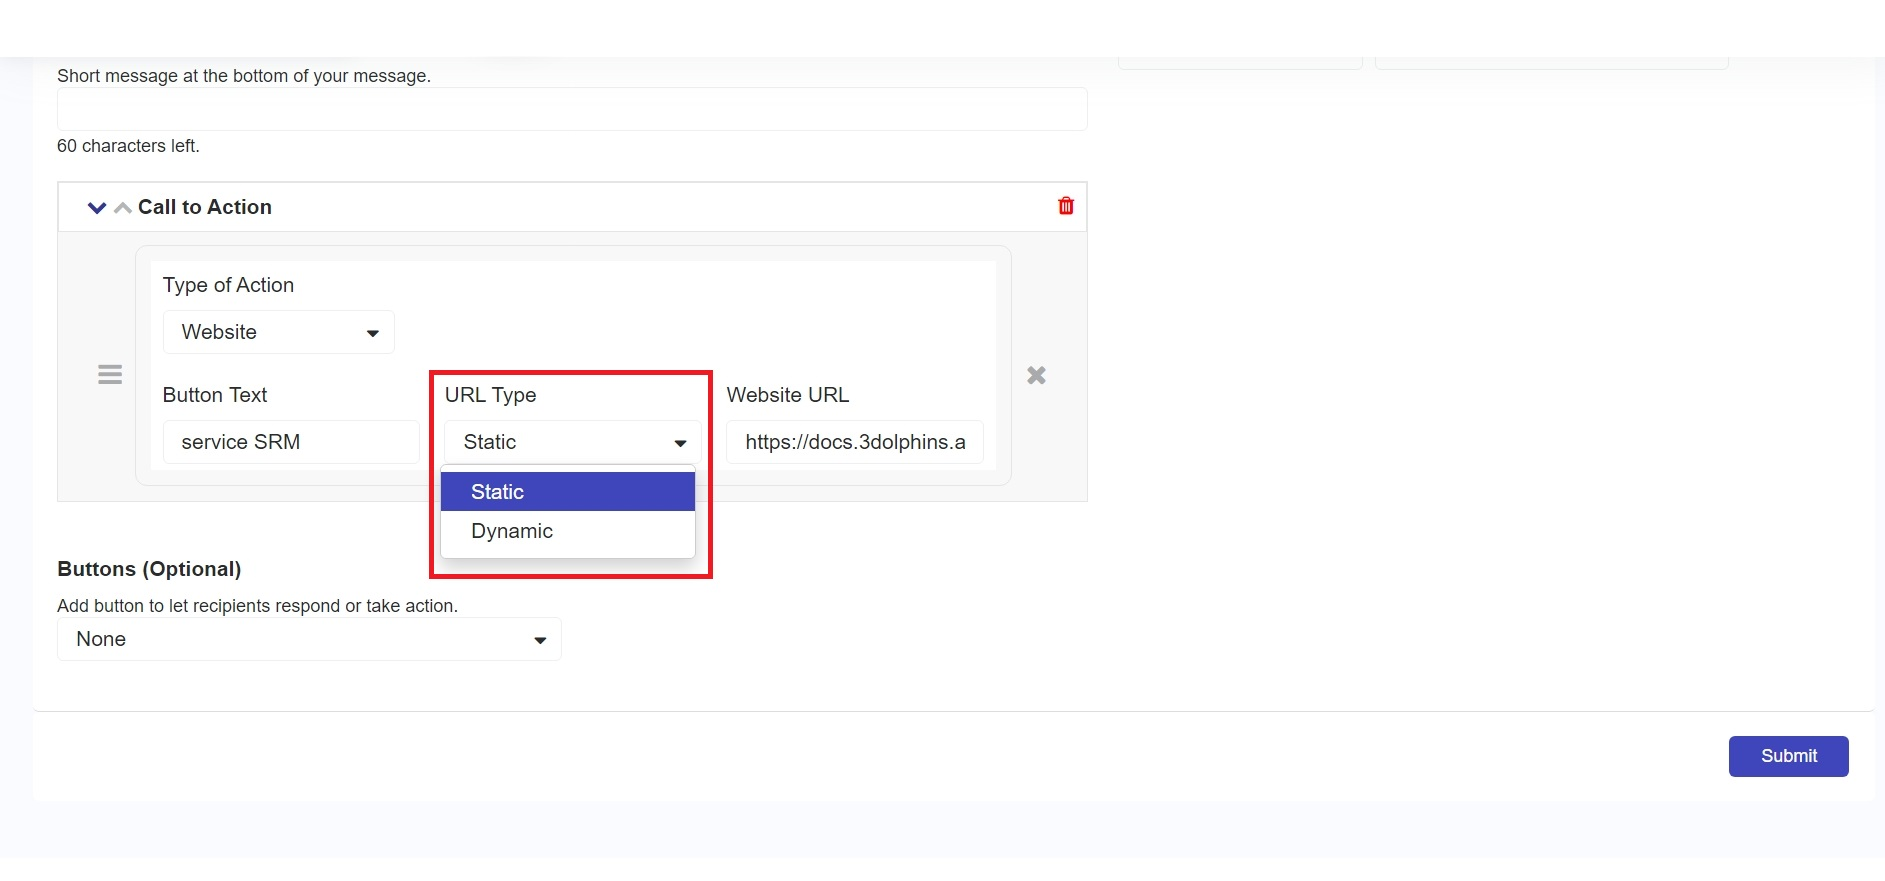
You can change the **URL Type** to **Static** or **Dynamic** based on your needs.

<figure><img src="/files/p6rcMHtSEMifSm3y6Uoz" alt=""><figcaption><p>Website/URL Button Type</p></figcaption></figure>

**Penjelasan Komponen:**

<table><thead><tr><th width="174.5">Name</th><th>Description</th></tr></thead><tbody><tr><td>Static</td><td>When you want all customers to be directed to the same page.</td></tr><tr><td>Dynamic</td><td><p>When you want customers to be directed to a specific page based on their data.</p><p></p><p><strong>Note:</strong></p><p>The link must be defined in the <strong>xls/csv</strong> file at the <strong>account &#x26; recipient</strong> stage of the <a href="/pages/-MUIM5czP7ul5x7Yx_My#upload-from-csv">notification</a> page.</p></td></tr></tbody></table>

### Call

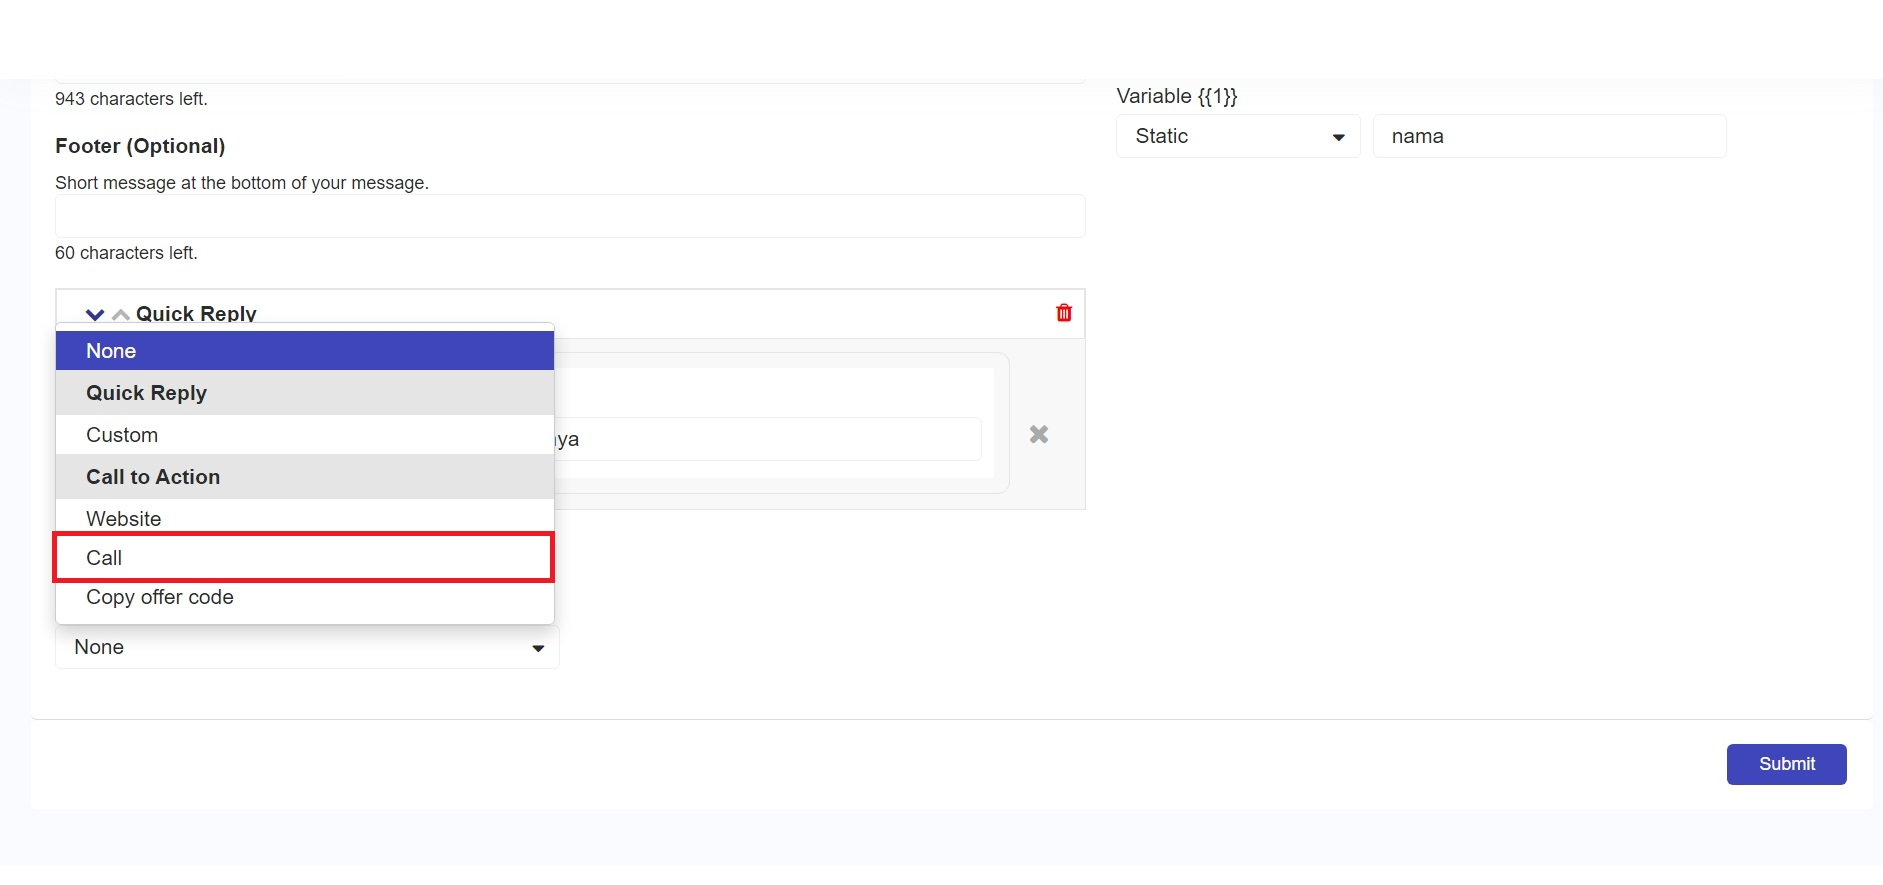
When you want customers to directly contact a specific number, you can use the **'Call'** button feature. To create action **'Call'** button, click the **'Buttons'** dropdown and click **'Call'**.&#x20;

<figure><img src="/files/pNM10N81EQW9wF1hgzHq" alt=""><figcaption><p>Call Button</p></figcaption></figure>

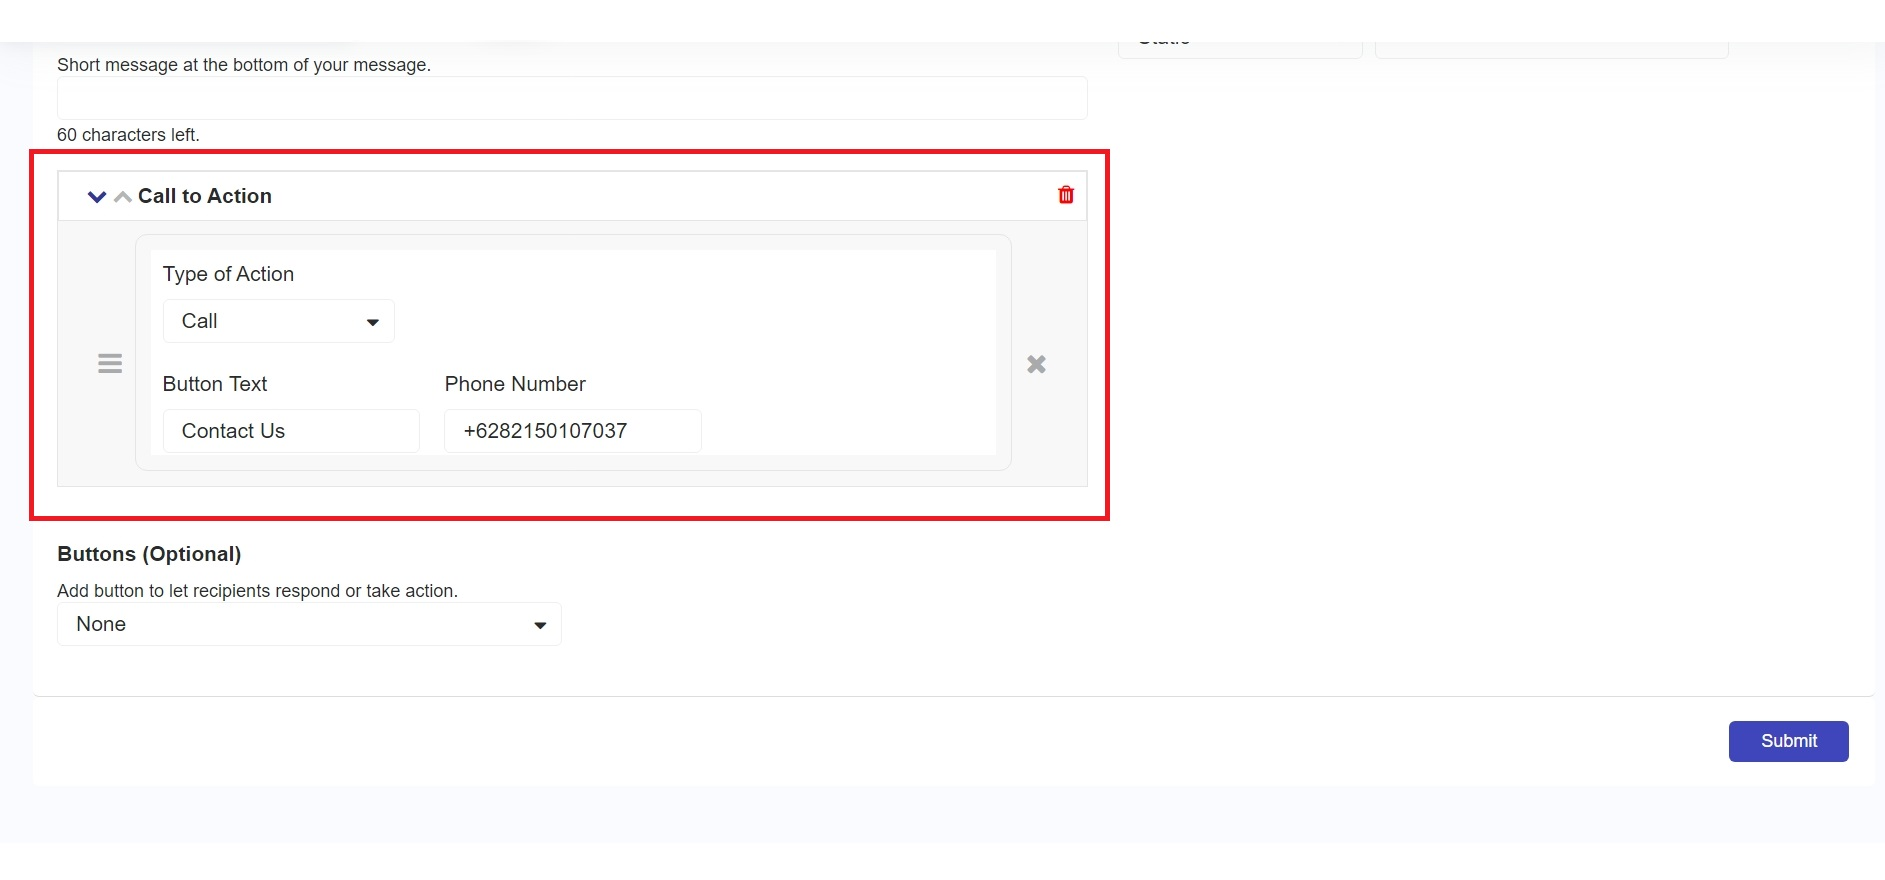
When the **'Call'** button has been added, you will see something like this.&#x20;

<figure><img src="/files/OFqMQ8aZCbWzEMbrs1oS" alt=""><figcaption><p>Set Call Buttons</p></figcaption></figure>

**Component Explanation:**

<table><thead><tr><th width="215.3333740234375">Name</th><th>Description</th></tr></thead><tbody><tr><td>Type of Action</td><td>Indicates the Call to Action (CTA) button type you have selected.</td></tr><tr><td>Button text</td><td>The text that will be displayed on the button.</td></tr><tr><td>Phone Number</td><td>You can enter the phone number that customers can contact when they press the <strong>'Call'</strong> button.</td></tr></tbody></table>

### Copy Offer Code

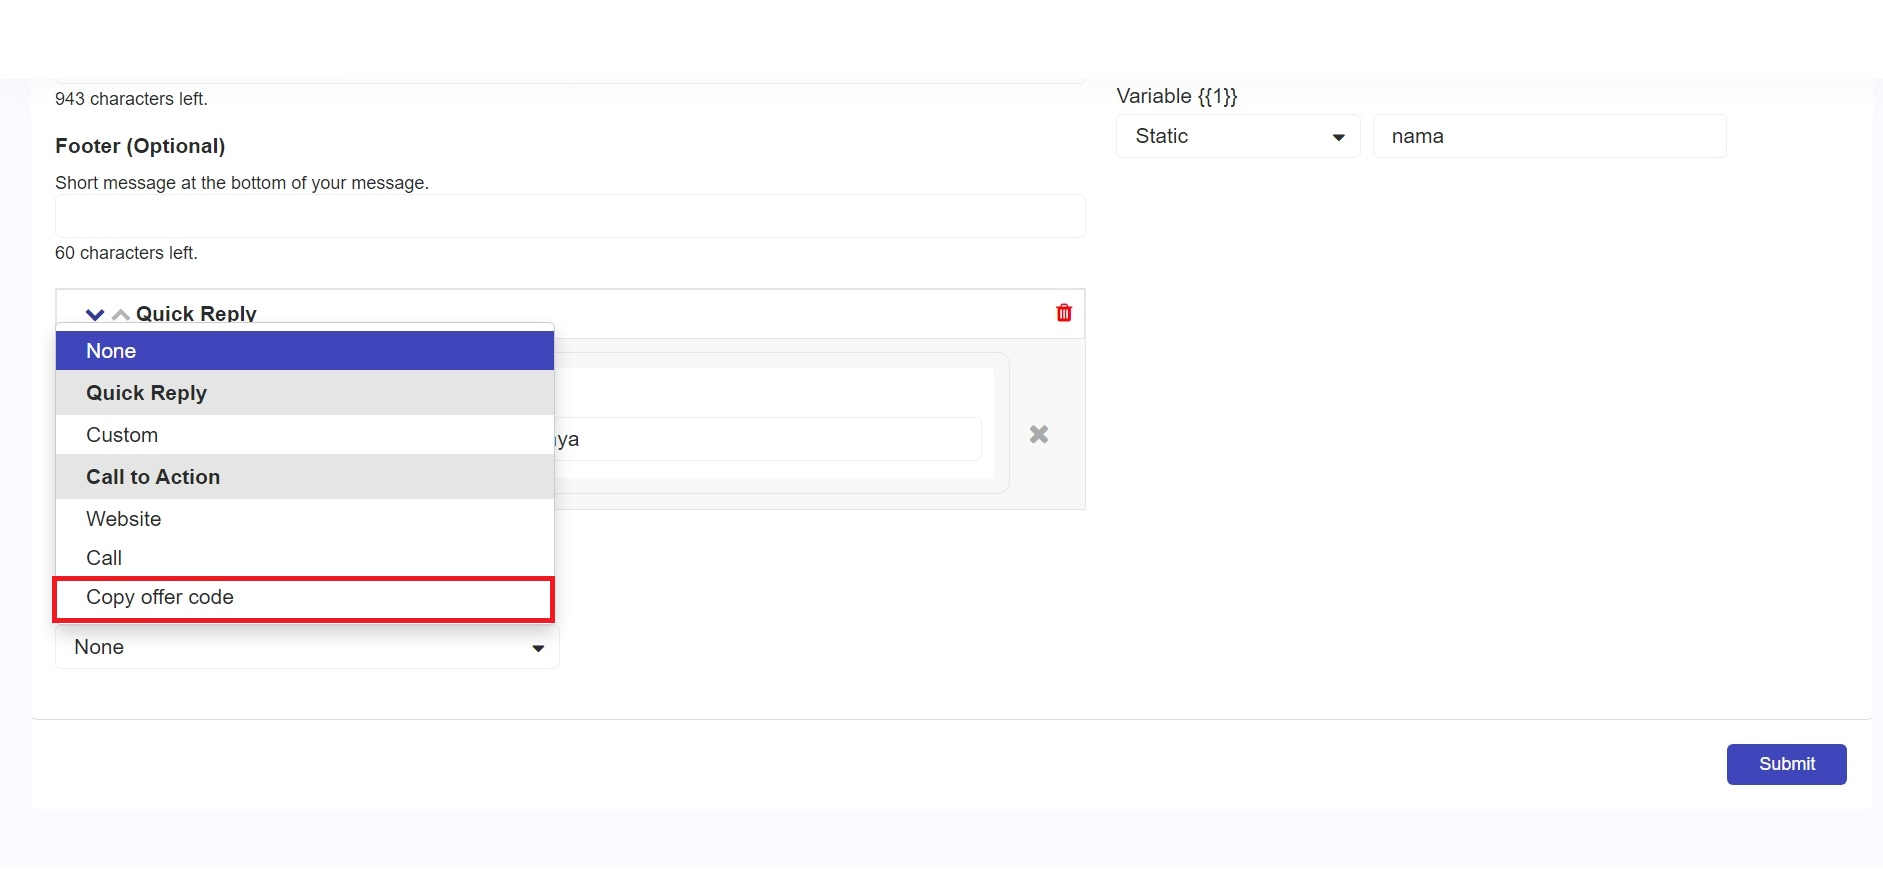
When you want customers to easily copy and use a promo code or available offer, you can use the **'Copy Offer Code'** feature. With this feature, customers can simply click the button without having to manually retype the code. To create a **'Copy Offer Code'** button, click the **'Buttons**' dropdown and select **'Copy Offer Code'.**

<figure><img src="/files/KF4ziDArLr1t4Q8Es0dx" alt=""><figcaption><p>Copy Offer Code Button</p></figcaption></figure>

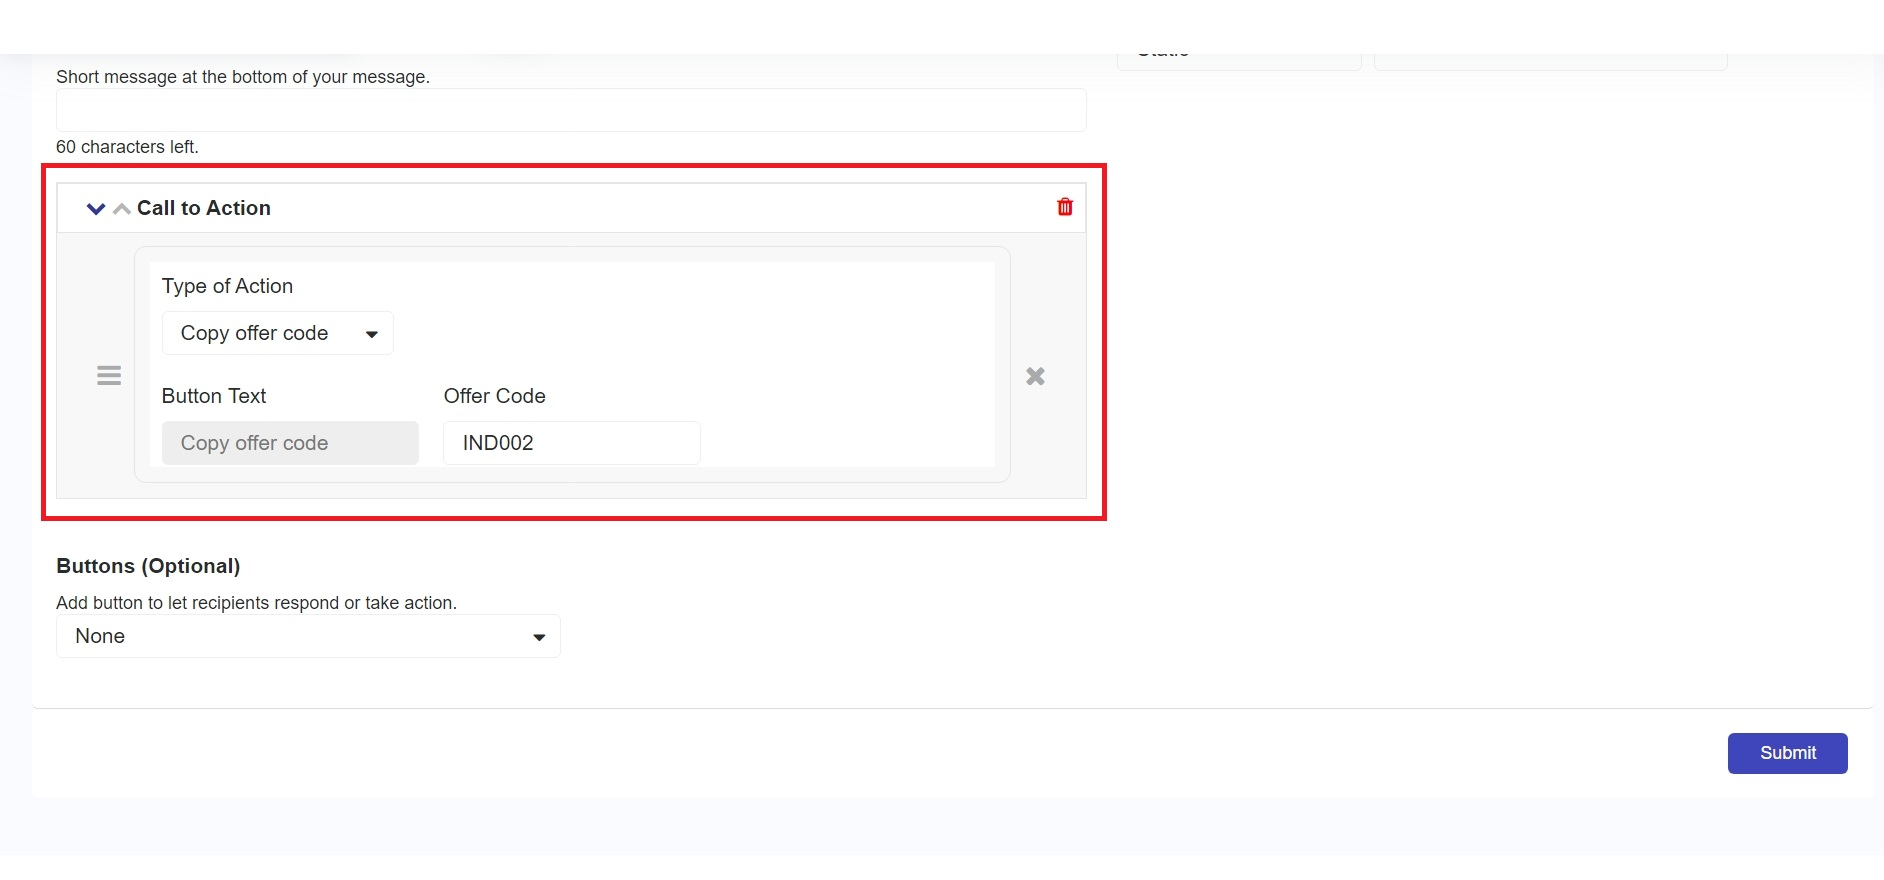
Once the **'Copy Offer Code'** button has been added, a box like the one below will appear.

<figure><img src="/files/ZpKqkuhPvMlBcDz34ryx" alt=""><figcaption><p>Set Copy Offer Code Buttons</p></figcaption></figure>

**Component Explanation:**

<table><thead><tr><th width="211.16668701171875">Name</th><th>Description</th></tr></thead><tbody><tr><td>Type of Action</td><td>Indicates the Call to Action (CTA) button type you have selected.</td></tr><tr><td>Button text</td><td>The text that will be displayed on the button.</td></tr><tr><td>Offer Code </td><td>A promo or discount code that you can enter so customers can copy the code.</td></tr></tbody></table>

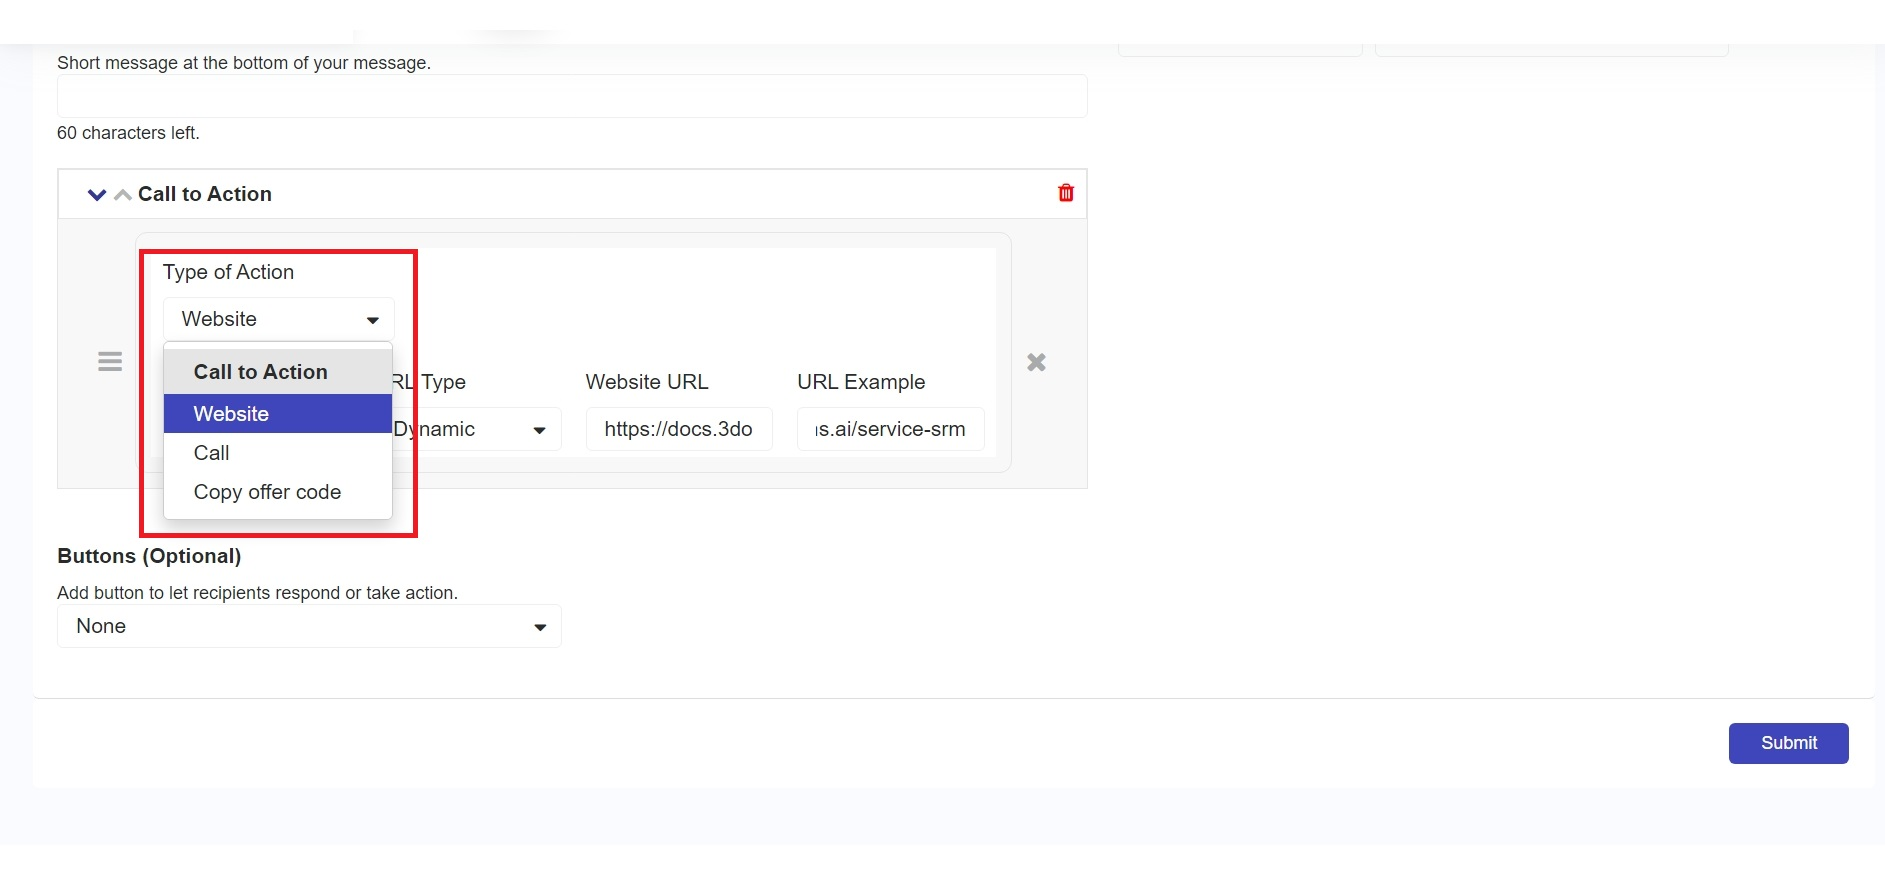
When you feel the need to change or modify an action, you can click the '**Type Of Action'** dropdown, as shown in the following image.&#x20;

<figure><img src="/files/yOrEID3jriFlqRfNEpW8" alt=""><figcaption><p>Change Action Button</p></figcaption></figure>

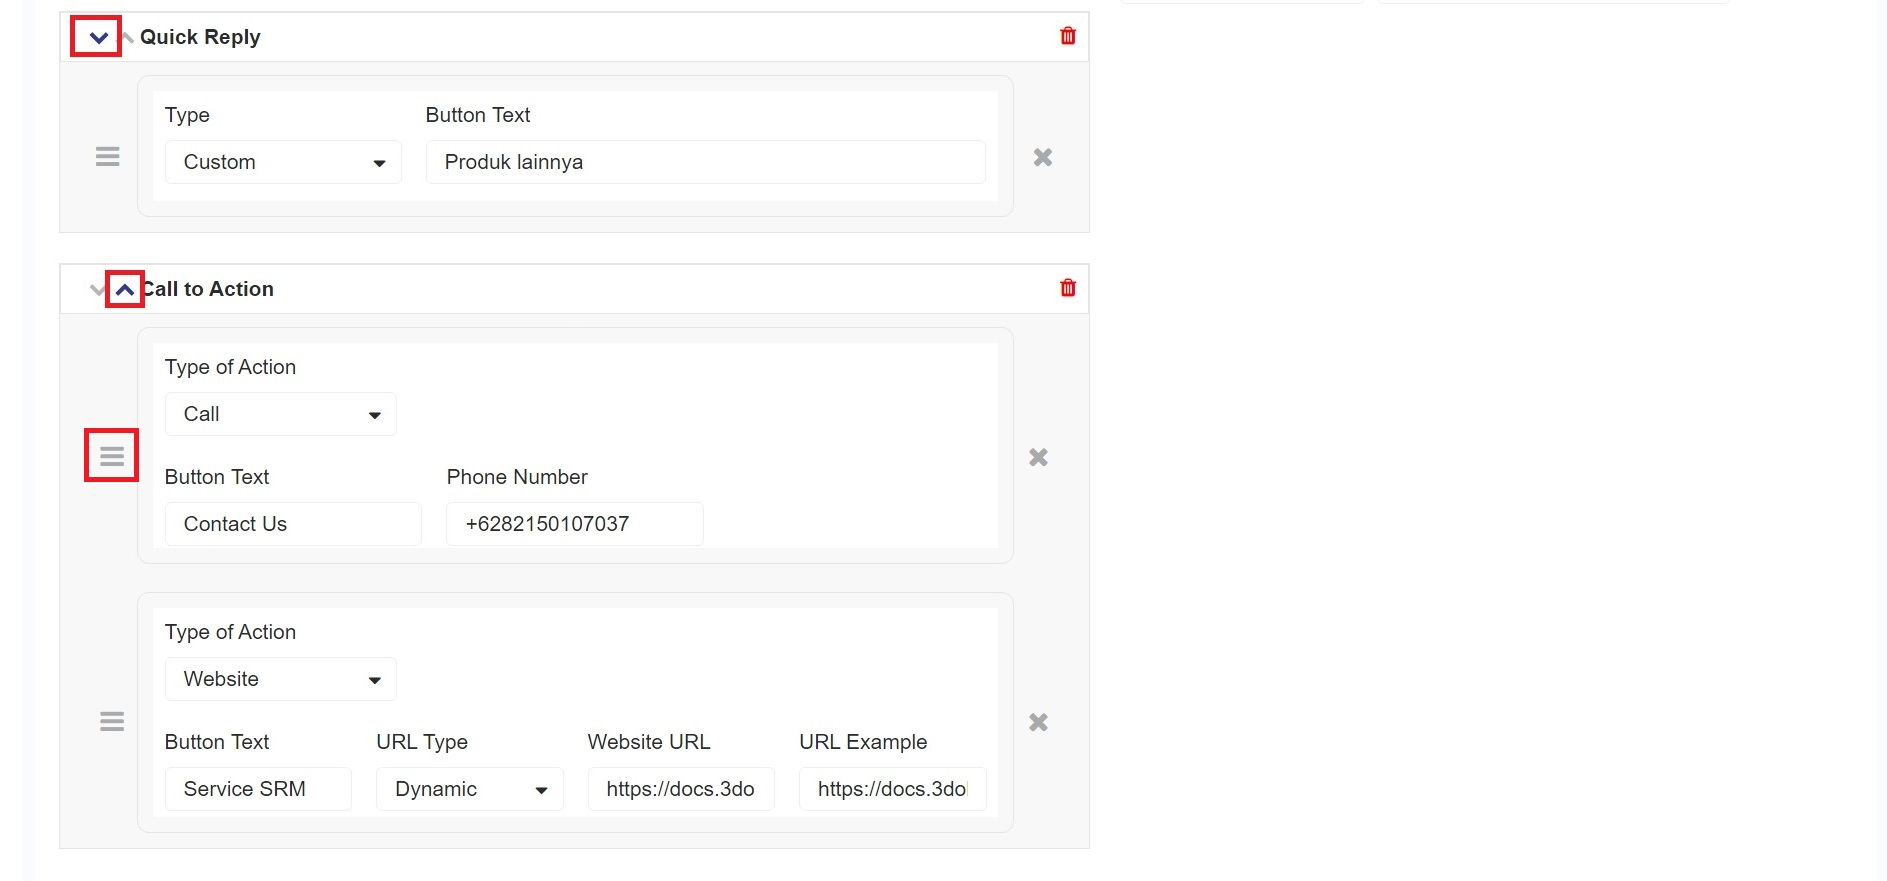
To reorder actions, you can click the **icon (** ![](/files/kN6Ouz4VoaDzjeWPdz0i) ) or ( ![](/files/4r804FUH3X8ecpCMdzko)). You can also reorder types within an action by dragging the icon ( <img src="/files/EOt5MRBmBaRyUh8kEjn5" alt="" data-size="line">).&#x20;

<figure><img src="/files/K9p2wuVn9627E1n7KPpm" alt=""><figcaption><p>Change Order Action Buttons</p></figcaption></figure>

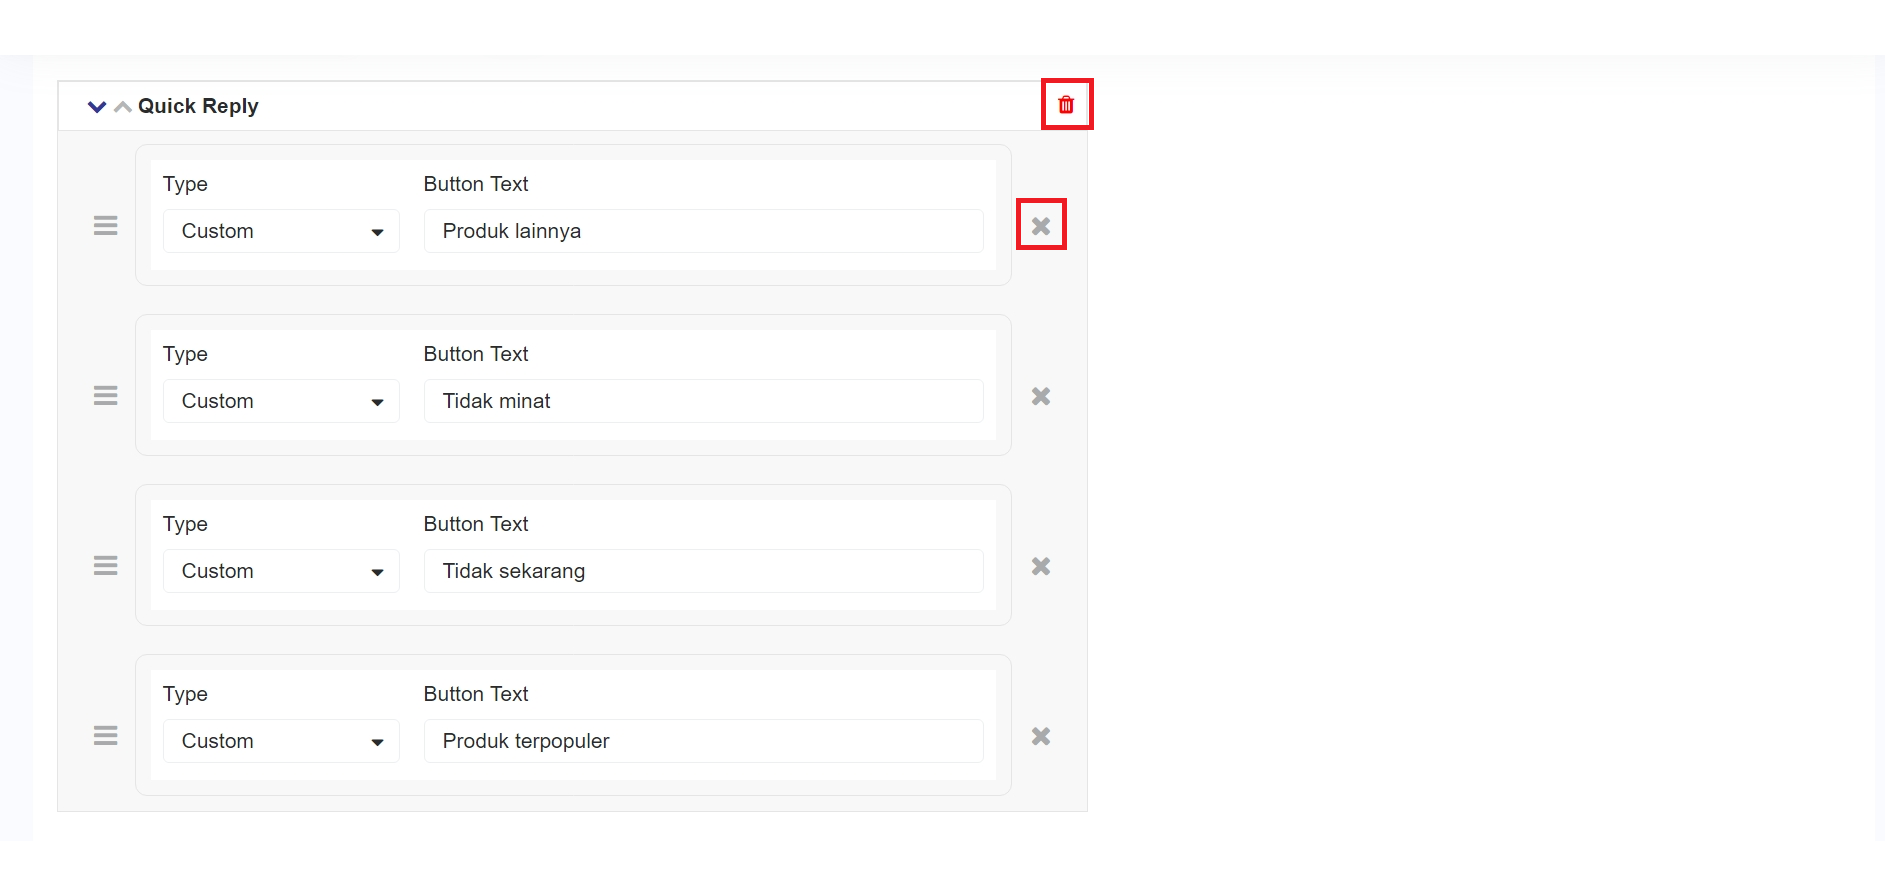
When you feel the need to delete an action, you can click the icon ( ![](/files/2cqGUwrjigMbAmCmgyy4)) to delete the action or click the icon (![](/files/Uki2fuceoqk3Wvx1rbfk) ) to delete the type of action.

<figure><img src="/files/kJHTGQ3Q6C0m9W3Sj2hM" alt=""><figcaption><p>Delete Action</p></figcaption></figure>

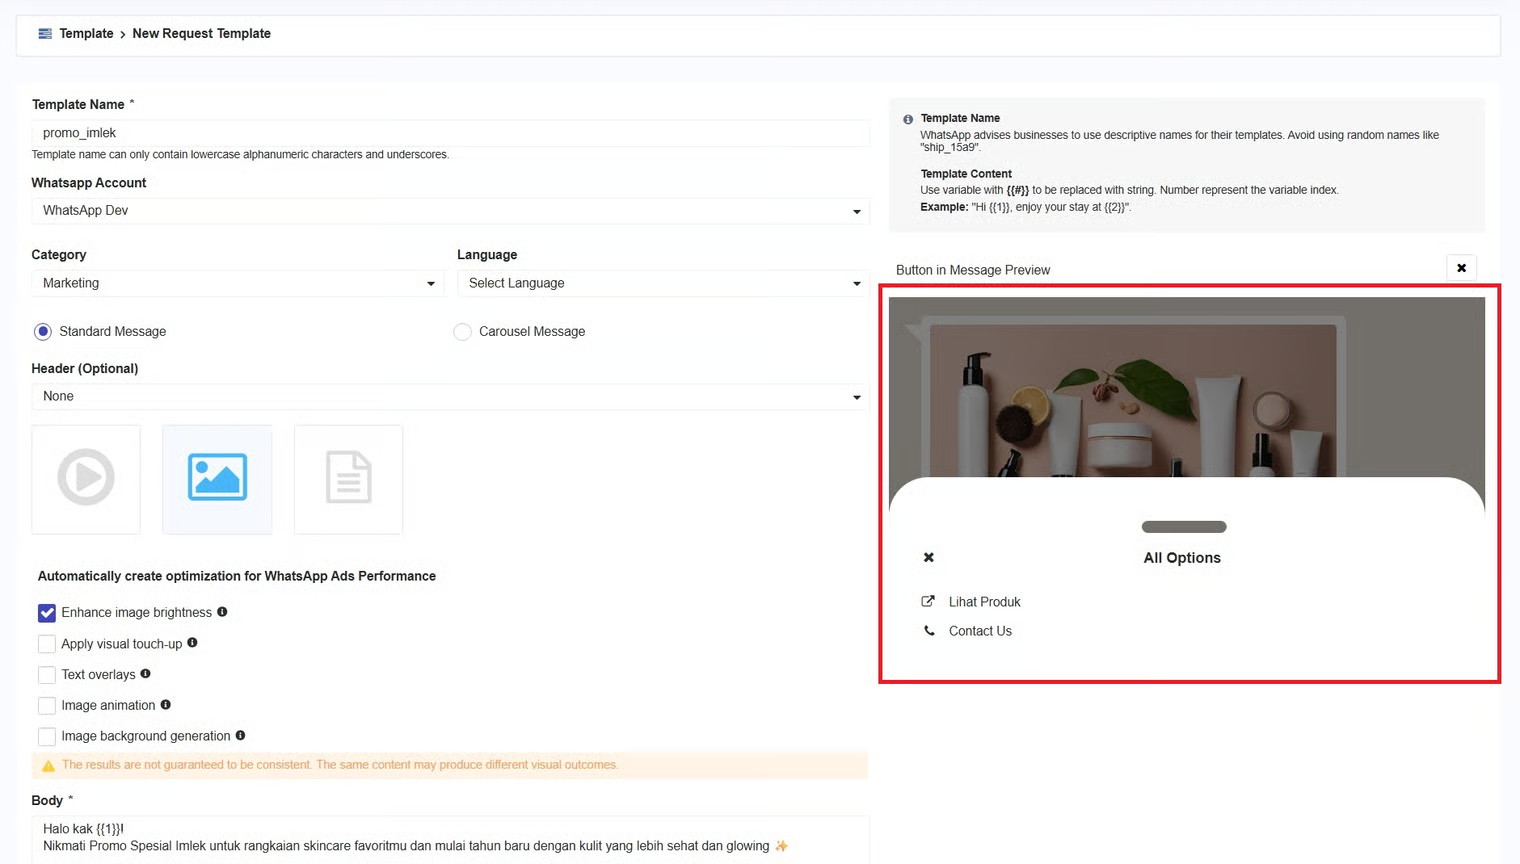
To view all the buttons that have been created, check the **Template Preview** section and click the **'Play'** button, as shown in the following image.

<figure><img src="/files/1Z0ILwV8WyMl4p8Hgxbt" alt=""><figcaption><p>Template Preview</p></figcaption></figure>

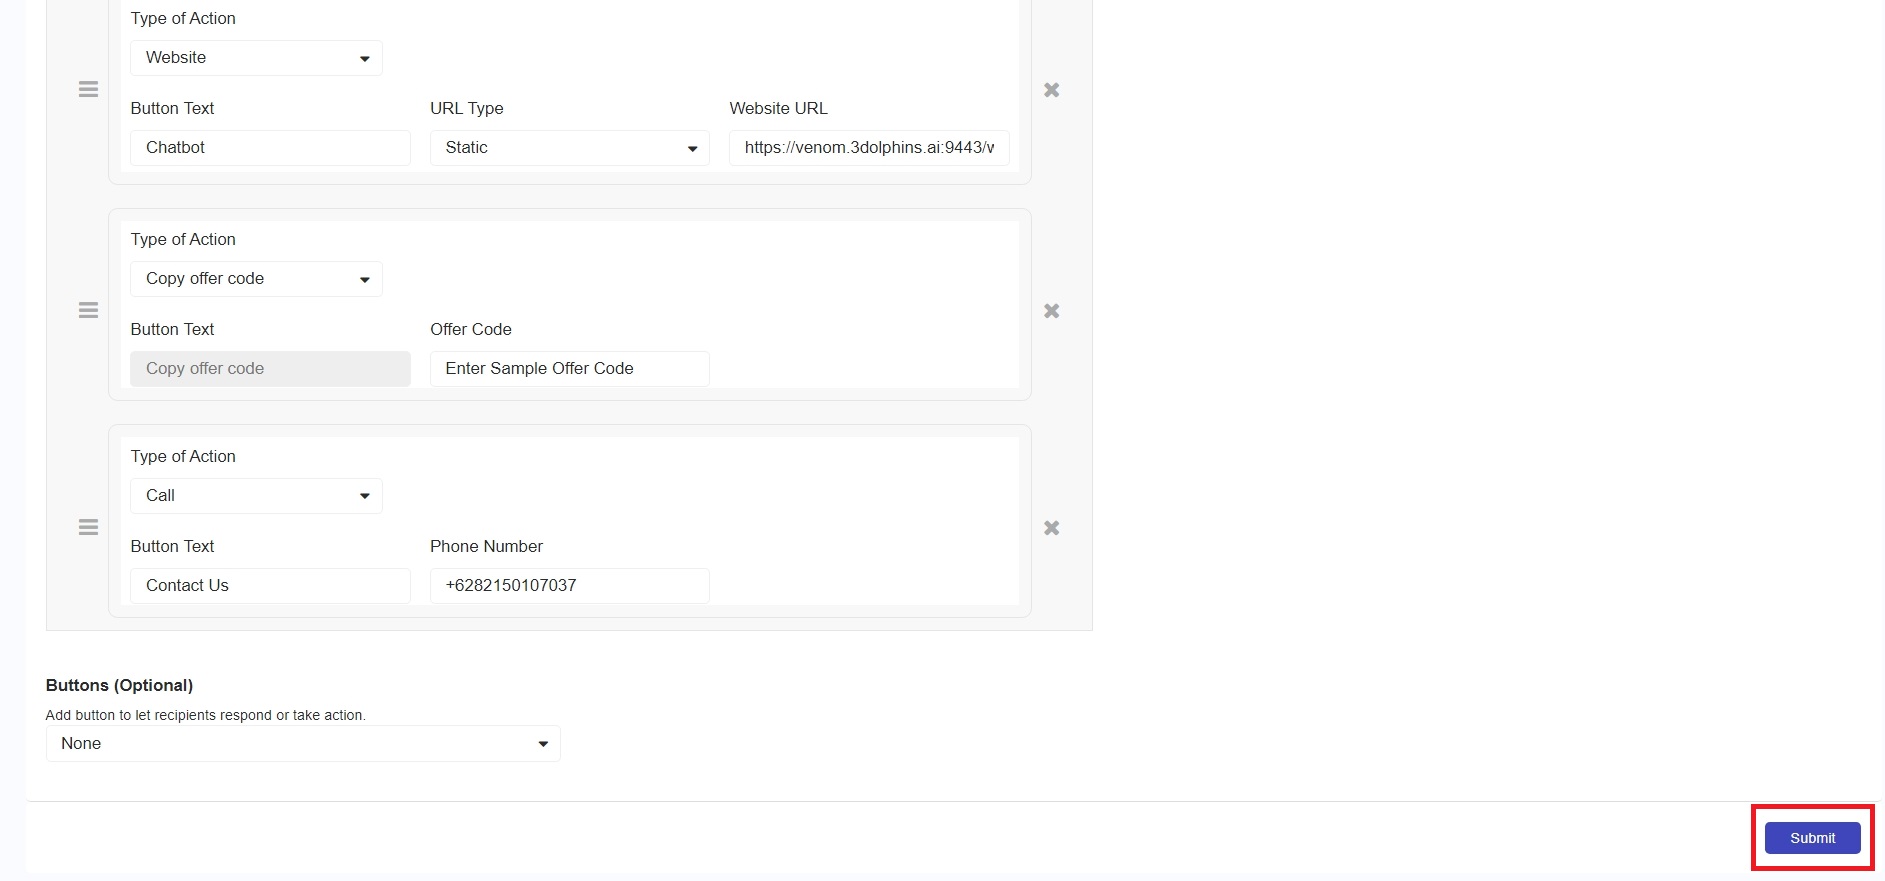
To save the created template, and click the **'Submit**' button.&#x20;

<figure><img src="/files/n5NQnd5VHY4X29BSosm8" alt=""><figcaption><p>Save Template</p></figcaption></figure>

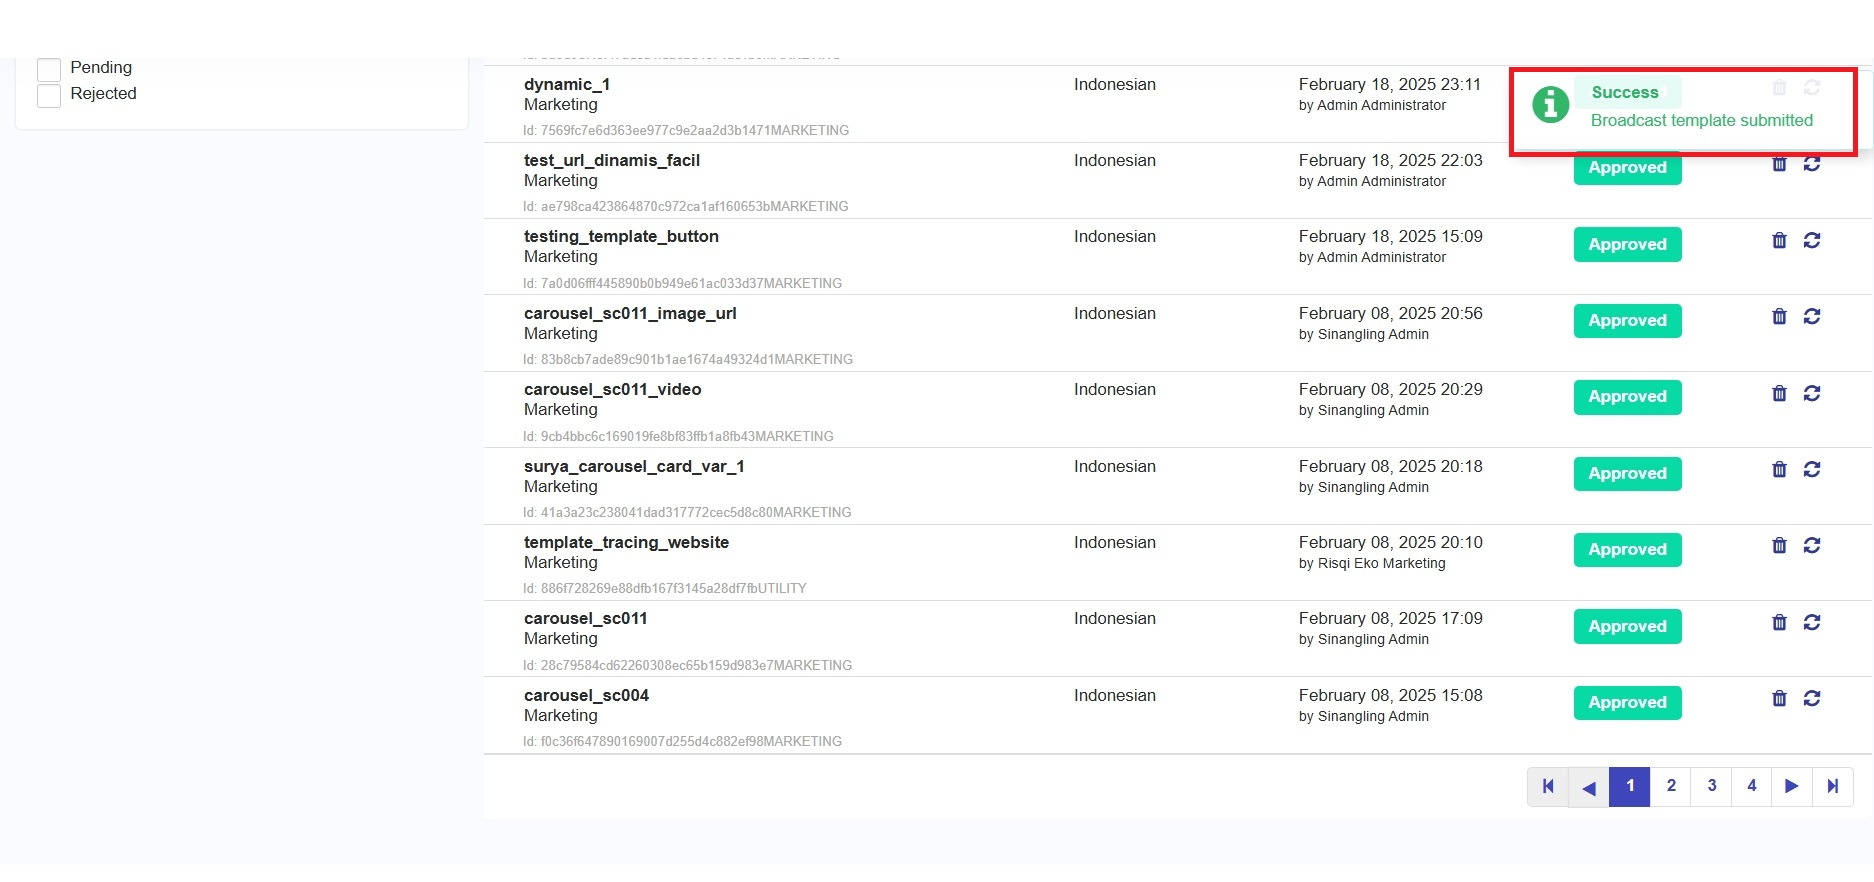
You will success notification once the template has been successfully saved, as follows.&#x20;

<figure><img src="/files/wMhjAYRSv6p1oZXHkSxT" alt=""><figcaption><p>Success Notification</p></figcaption></figure>